Sorry for my absence. No real excuse . . . sometimes I guess I just have nothing to say. I'm sure there are some people who wish that were true!
The month of June was so hot I felt like my brain was melting. I have so much gardening to do and I couldn't stand being outside longer than an hour. It was so dry as well which luckily meant that the grass didn't need to be cut very often . . . what a relief. July has been cooler . . . in the 80's . . . and we've caught up on the rain a bit. I can usually garden in the morning as the rain has been arriving in the afternoon and evening.
I spent a lot of time in June in the house stitching (of course). Abandoned one design that just doesn't seem to be working . . . will pick it back up later and see if I can work it out. Looks great on paper . . . not so much on cloth. Love the colors I picked and they look great with the fabric . . . there just doesn't seem to be any life to it. Something will come to me.
I did get some inspiration from Brie cheese. Yes, Brie cheese. I happen to love Brie. It's especially good on Carr Wheat Crackers topped with a little Fig spread or Lingonberry jam . . . oh yeah! (The Camembert works almost as well with the Fig spread or Lingonberry jam . . . I just prefer Brie) The inspiration came from the little box the Brie (or Camembert) comes in. You know, the President Brie box:
Why not use it! (Any 4 1/2 inch diameter box will do) So, I designed a little piece that will fit nicely using 28 - 32 count fabric. One was stitched on 32 count R & R Reproductions Creme Brulee using the word "Bloom" with pink flowers and the other on 32 count Lakeside Linens Vintage Lentil fabric with the word "Buzz" with purple flowers (I don't have any 28 or 30 count fabric in my stash, but the design should fit those counts as well . . just coming a bit closer to the edge).
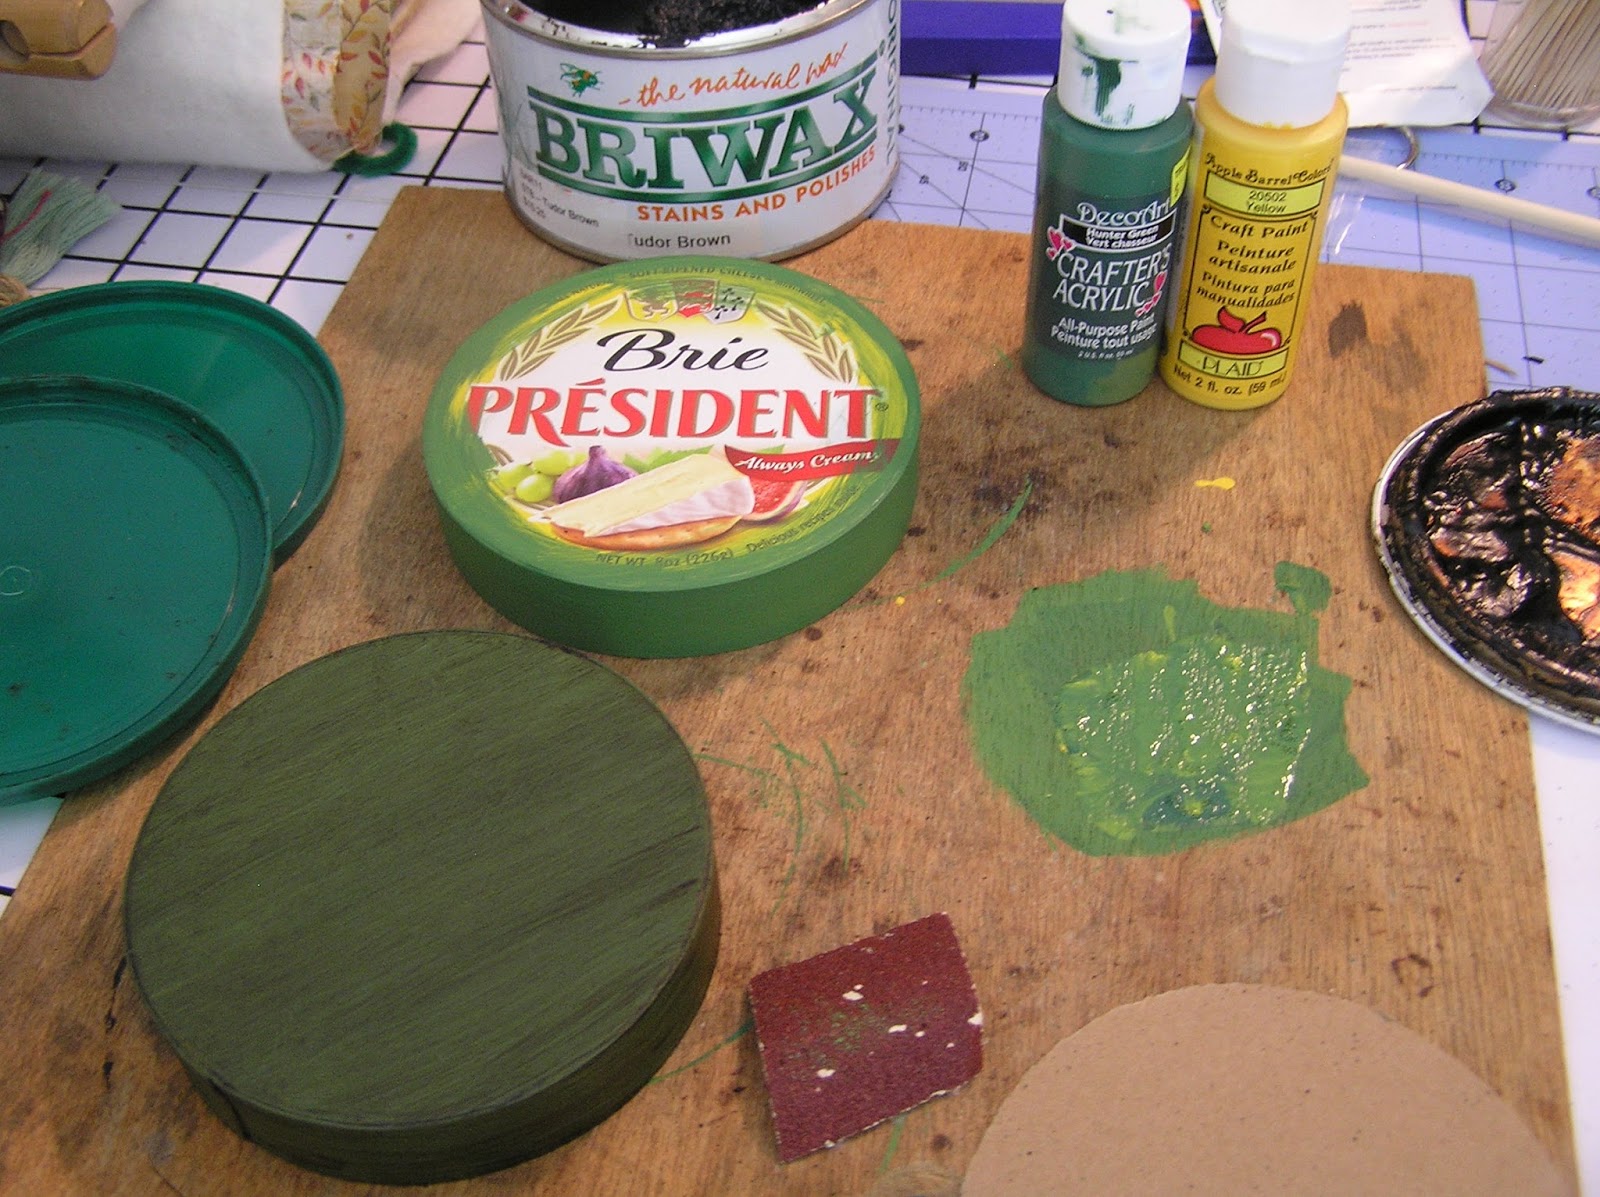
After stitching the design, I chose paint colors to paint the boxes. I didn't have the right shade of green . . . I have a lot of paint and didn't want to go buy another one so I mixed a dark green I had with a yellow. I knew the color would be darker once I BriWaxed it so it didn't need to match exactly.

After painting it with two coats, I lightly sanded the box before BriWaxing it . . . made it look a little older I think . . . worn around the edges. I used "Tudor Brown" BriWax. Rubbed it on with a cloth and buffed it when it was dry.
I didn't paint the inside, just BriWaxed it. I cut out a circle of paper and glued it inside the bottom and top of the box to give it a more finished look. The top and bottom of the box are different sizes so trace around each piece and cut your circles out just a bit smaller to fit inside. The paper was from a couple of decorative shopping bags I had . . . is this a recycle project or what!
YES, I'm a hoarder . . .
I don't throw anything away that I think I can make something out of ! ! !


Trace another circle on a piece of cardboard and cut it out so it is 1/4 inch smaller all the way around than the lid. Cut two pieces of batting, one should be 1/4 inch larger than the cardboard circle and one smaller than the other. You may want to tack these down to the cardboard so they don't move . . . a little dot of glue will do.
Center the stitched piece on the cardboard circle and draw a circle about an inch bigger on all sides. I then used Fray Check on my drawn line and when it was dry I cut my piece out. Use a running stitch with doubled sewing thread, stitch about a 1/4 inch from the edge all the way around the piece. Center the stitched piece over the batting and cardboard and pull the running stitch thread ends tight to enclose the batting and cardboard. Tie the thread ends together tightly and shift your design to center it.

Glue your stitched piece to the Brie lid and weight it down until the glue is dry. (I used Paper Source PVA glue which is a book binding glue . . . works great) When your glue is dry, finish off the piece with trim glued around the stitched piece. I used Kelp Chenille by R & R Reproductions glued down using the PVA glue . . . just a light touch so as not to squish the chenille. You could use a bulky yarn or a cording . . . there are lots of trims out there.
Viola! You're finished . . . with the box . . . and the Brie I'm guessing!
Happy Stitching and Eating! ~*


 Trace another circle on a piece of cardboard and cut it out so it is 1/4 inch smaller all the way around than the lid. Cut two pieces of batting, one should be 1/4 inch larger than the cardboard circle and one smaller than the other. You may want to tack these down to the cardboard so they don't move . . . a little dot of glue will do.
 Glue your stitched piece to the Brie lid and weight it down until the glue is dry. (I used Paper Source PVA glue which is a book binding glue . . . works great) When your glue is dry, finish off the piece with trim glued around the stitched piece. I used Kelp Chenille by R & R Reproductions glued down using the PVA glue . . . just a light touch so as not to squish the chenille. You could use a bulky yarn or a cording . . . there are lots of trims out there.